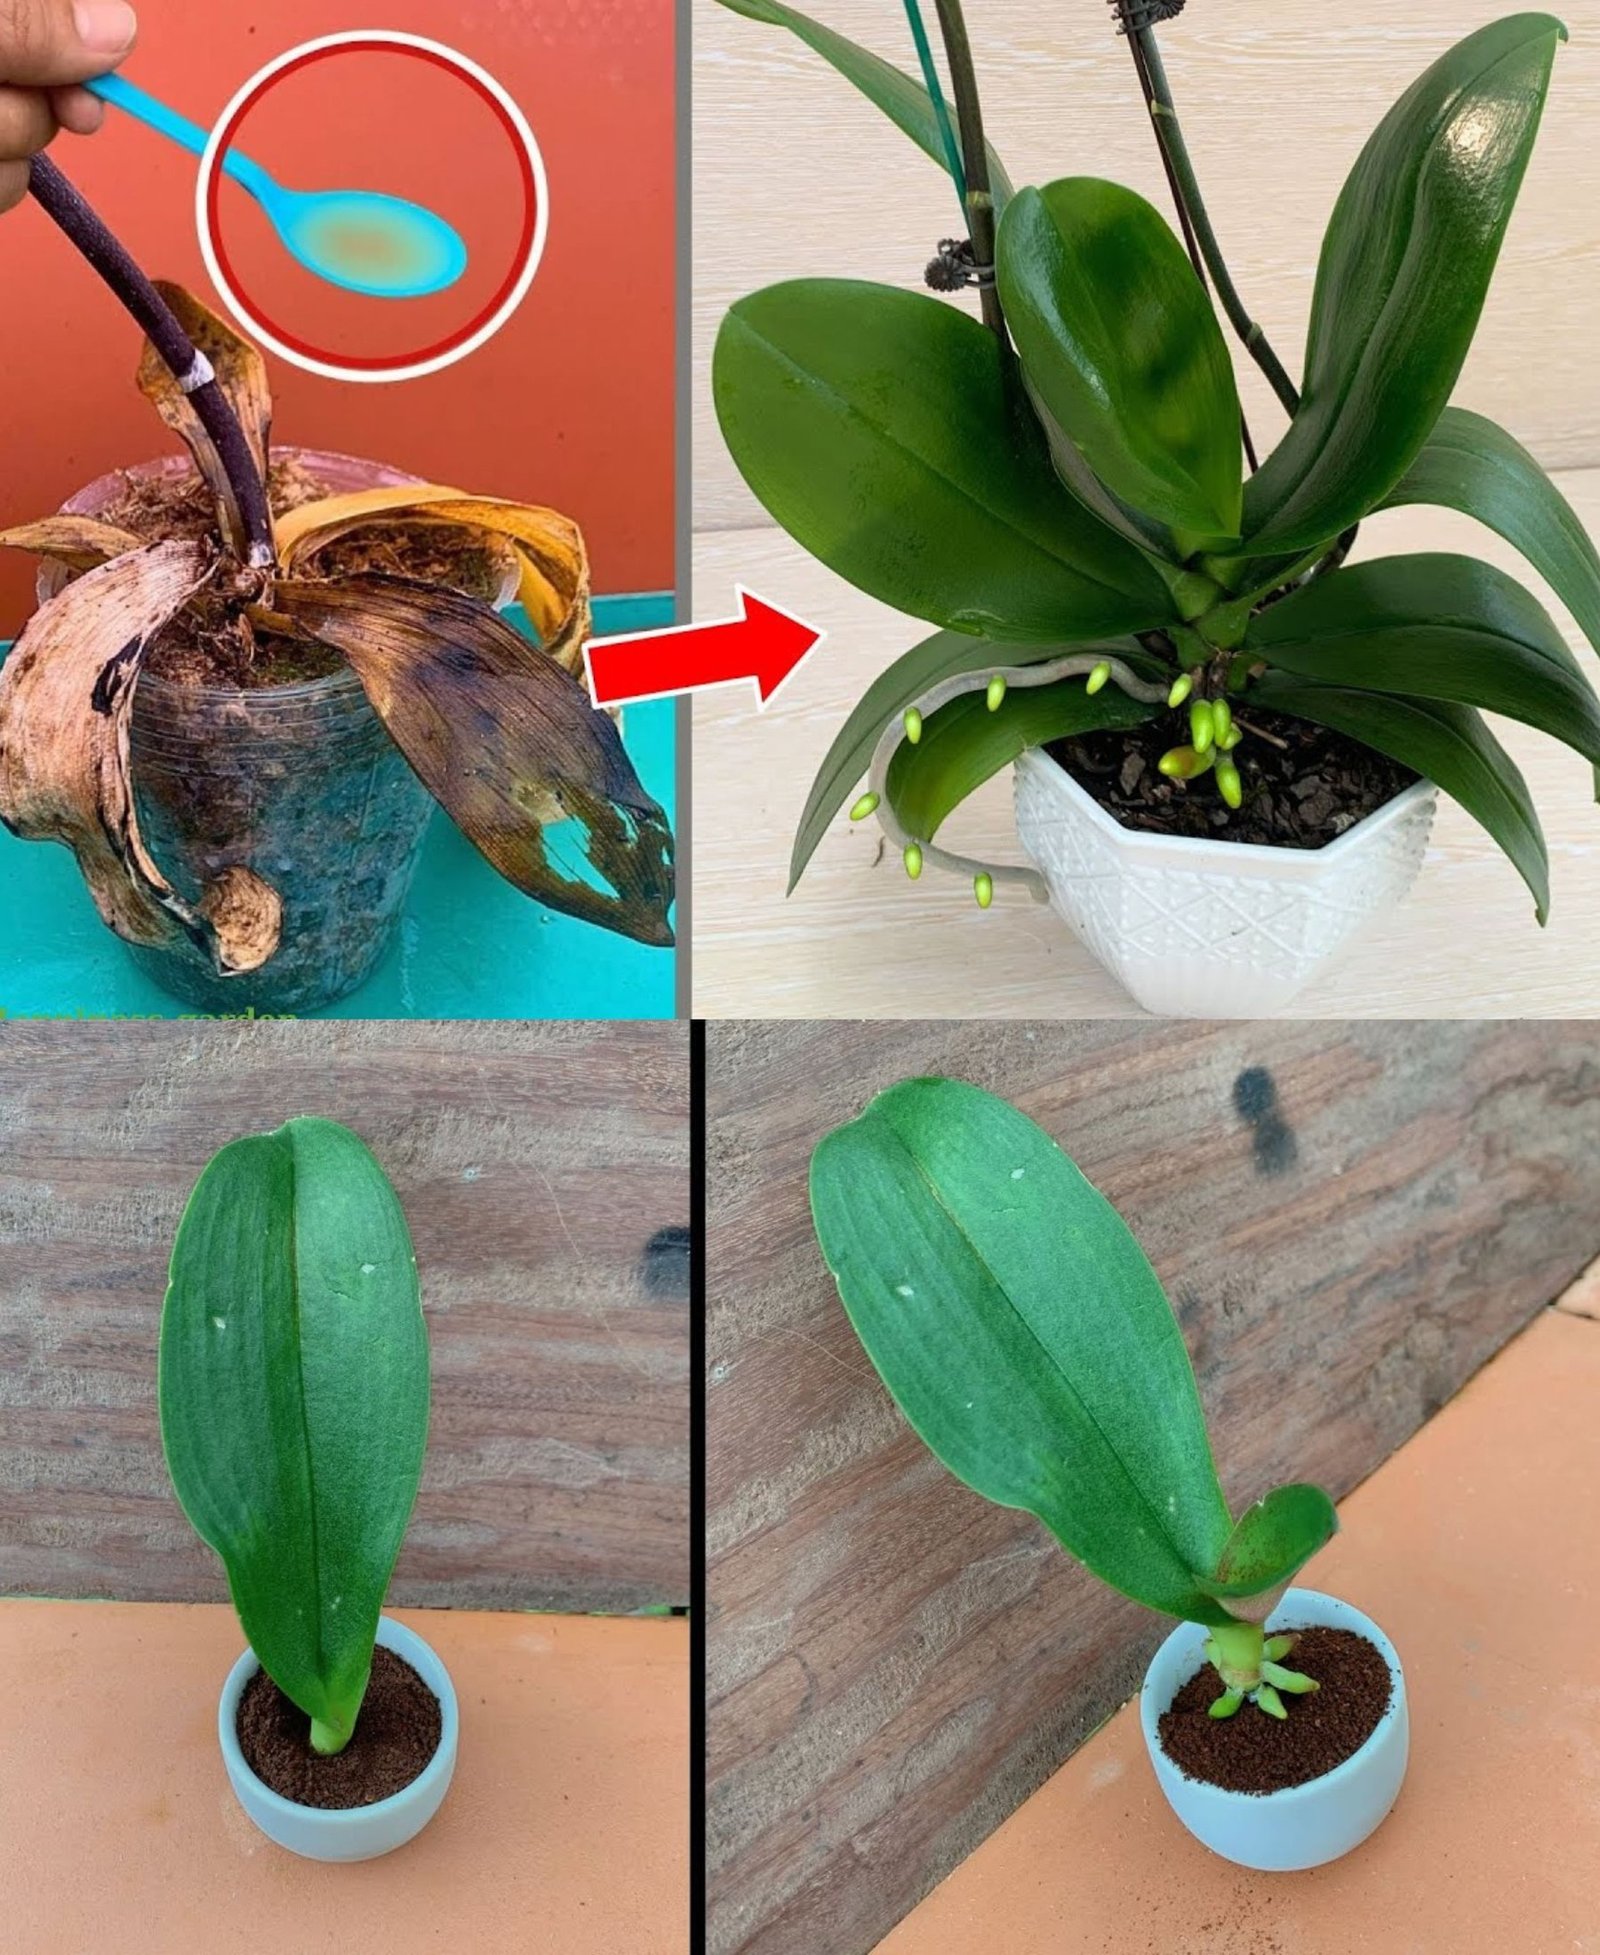
How to Save Orchids with Rotten Roots Using Reverse Water Culture
Orchids are beautiful and delicate plants, but they can sometimes suffer from root rot, which can make it challenging to keep them alive. However, even if an orchid has lost all of its roots, it is still possible to revive it with a highly effective method known as reverse water culture. This method allows the orchid to regrow its roots and regain its health. If you have an orchid with healthy leaves but no viable roots, follow this practical step-by-step guide to encourage new root growth and bring your plant back to life.
Step 1: Assessing the Orchid’s Condition
Before starting the revival process, carefully examine the orchid. If the leaves are still firm and green but the roots are mushy, brown, or hollow, the orchid is suffering from root rot. Remove the orchid from its potting medium and inspect the roots thoroughly. If they are all rotten and hollow, they must be cut off to give the plant a fresh start.
Step 2: Removing Rotten Roots
Using a clean, sterilized pair of scissors or pruning shears, trim off all dead and rotting roots. These roots will not support the plant and can harbor bacteria or mold. Ensure that you cut away any soft, brown, or hollow parts until only firm and healthy tissue remains. If necessary, also trim away any old, woody root sections, as these can become a breeding ground for mold.
Step 3: Disinfecting the Orchid
Once all the dead roots have been removed, it is essential to disinfect the cut areas to prevent infections and mold growth. You can do this by sprinkling a natural antifungal agent like cinnamon powder or turmeric powder onto the cut ends. Both of these substances help protect the orchid from fungal infections and aid in the healing process.
Step 4: Preparing the Reverse Water Culture Setup
To encourage the growth of new roots, you will need a transparent plastic or glass cup. Transparency is crucial because it allows light to penetrate, stimulating root growth. Here’s how to set up the reverse water culture:
Fill the Cup with Water: Use purified, filtered, or rainwater instead of tap water, which contains chlorine and other chemicals that can hinder root development.
Position the Orchid Correctly: Unlike traditional water culture, where the roots are submerged, reverse water culture involves placing the orchid’s stem and lower leaves in the water, while the crown and base remain above.
Support the Orchid: Use a stick or skewer to keep the orchid stabilized in the cup. This prevents the stem from getting wet and rotting.
Step 5: Monitoring Root Growth
The orchid will absorb moisture through its leaves, stimulating the growth of new roots. Over the next two weeks, you should begin to see small root tips forming. Keep the following points in mind:
Maintain High Humidity: Orchids thrive in humid conditions. If your environment is dry, consider misting the leaves lightly or placing a humidity tray nearby.
Keep the Water Clean: Change the water every 3-5 days to prevent bacteria buildup. Always use fresh, chlorine-free water.
Check for Progress: Within 2-3 weeks, new roots should start emerging. By 3-5 months, the roots will be significantly longer and stronger.
Step 6: Transferring the Rooted Orchid to a Pot
Once the roots have grown to at least 5-7 cm in length, the orchid is ready to be potted. If the roots are still too short, continue the reverse water culture process for a few more weeks. Here’s how to properly pot the orchid:
Prepare a Well-Draining Potting Mix: Use a combination of pine bark, peat moss, and sphagnum moss. These materials retain moisture while allowing good airflow.
Select a Proper Pot: Choose a transparent orchid pot with drainage holes. This allows you to monitor root health and prevent water accumulation.
Create Drainage: Add a layer of clay balls at the bottom of the pot to help with drainage and moisture retention.
Place the Orchid Gently: Position the orchid so that its roots are slightly above the soil level, allowing them to spread naturally.
Add Soil Gradually: Cover the roots lightly with the prepared potting mix, ensuring that they have enough space to grow.
Step 7: Watering and Providing Light
After potting, give the orchid its first watering. Follow these steps for optimal care:
Watering: Pour water into the pot until it reaches the halfway point. Let the orchid soak for about 10 minutes, then drain out the excess water.
Light Exposure: Place the orchid near a bright window with indirect sunlight. Orchids need plenty of light but should be protected from direct sun, which can scorch the leaves.
Humidity Maintenance: If the environment is dry, mist the leaves or use a humidity tray to keep moisture levels high.
Fertilization: Once the orchid starts developing new leaves and roots, you can provide a liquid orchid fertilizer to support growth.
Final Tips for a Healthy Orchid
Be Patient: Root growth takes time. It may take several months for your orchid to establish a strong root system.
Avoid Overwatering: Too much water can lead to root rot. Always check the roots before watering.
Keep an Eye on Leaves: Healthy leaves indicate that the orchid is doing well. If they start turning yellow or wrinkling, adjust the care routine accordingly.
By following these steps, you can successfully revive a rootless orchid and watch it flourish again. The reverse water culture method is a simple yet highly effective way to encourage root regrowth and ensure your orchid thrives for years to come!